Ninja Woodfire Whole Chicken in 45 Minutes (No Brine Needed)
I cooked thousands of whole chickens as a professional chef, and here’s what I learned: you don’t need to brine. Spatchcock the bird, sear it hot, finish it low, and you get crispy skin and juicy meat in 45 minutes. The Ninja Woodfire handles the smoke; my instructions will help you handle the rest of this Ninja Woodfire Whole Chicken.

This post may contain affiliate link(s). As an Amazon Associate, I earn from qualifying purchases. See Disclosure.
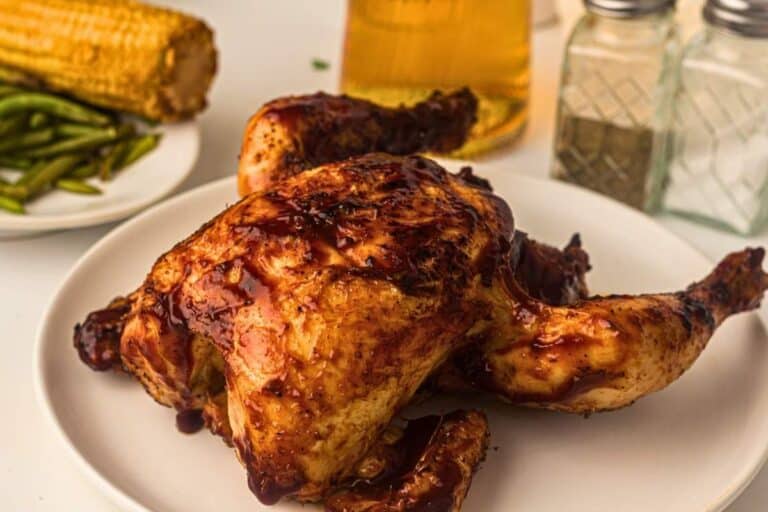
Elevate your cooking game and treat everyone to a delish smoke-infused meal! Just look at the color that Woodfire smoke gives the chicken – it’s mahogany, juicy, succulent, and oh-so good. There’s no real secret to this dish, just controlling the heat of your Ninja so that the chicken has time to cook through. And when you spatchcock the chicken – more on that below, it cooks more evenly.
Why My Method is Different
Most Ninja Woodfire whole chicken recipes will tell you to brine the bird hours ahead of time, then set the Smoker function at 350°F and walk away for an hour. That gives you smoky chicken, but the skin comes out rubbery. Other recipes have you smoking for two or three hours at 225°F, which I save for ribs and brisket, not chicken.
My method uses the Grill setting with the woodfire button on, sears the skin first at high heat, then drops to low to finish. You get bite-through crispy skin and deep smoke flavor in 45 minutes, the two things you usually have to choose between with a whole bird.

What You’ll Love About Ninja Woodfire Grill Smoky Whole Chicken
- 45 minutes start to finish, no brining, no marinating, no three hour smoke session
- Crispy skin AND deep smoke flavor, not one or the other like most Ninja Woodfire chicken recipes
- Two ingredients (a whole chicken and Montreal chicken seasoning), no spice cabinet raid
- No basting, no flipping every five minutes, no spritzing, just a meat thermometer and you’re good
- Spatchcocking is the trick every restaurant kitchen I worked in used to roast chicken fast and evenly, and it works just as well on the Ninja
Ingredients
To make this delectable dish, you’ll need:
- Pellets – Opt for your favorite blend of pellets, or Ninja’s mild blend.
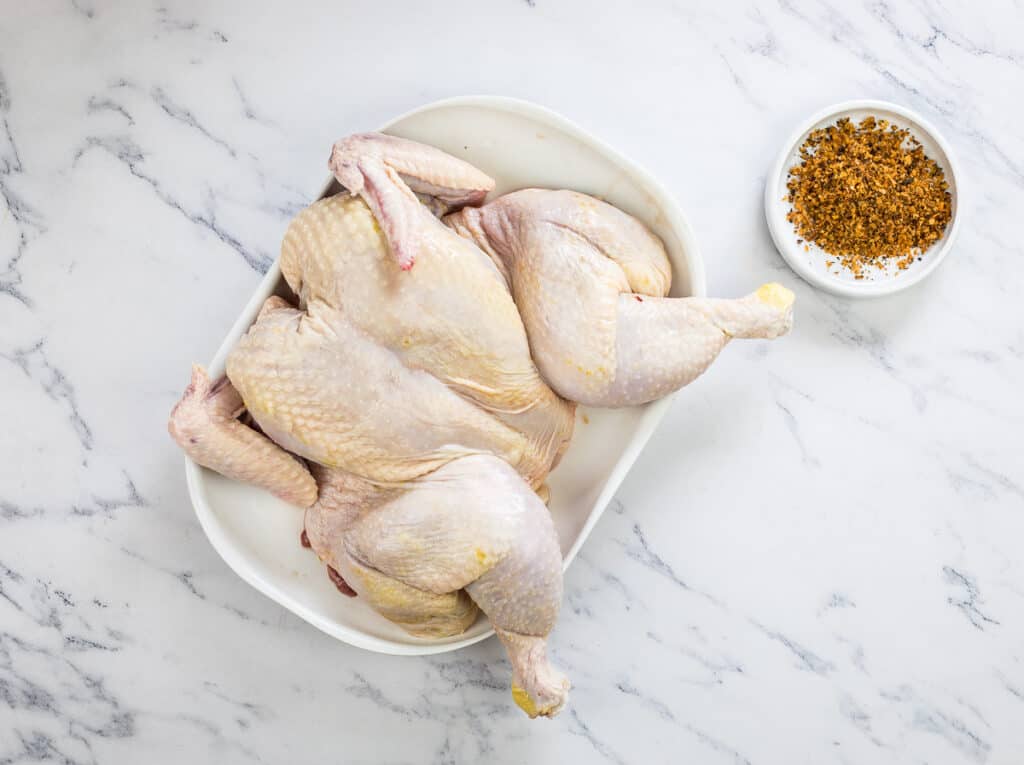
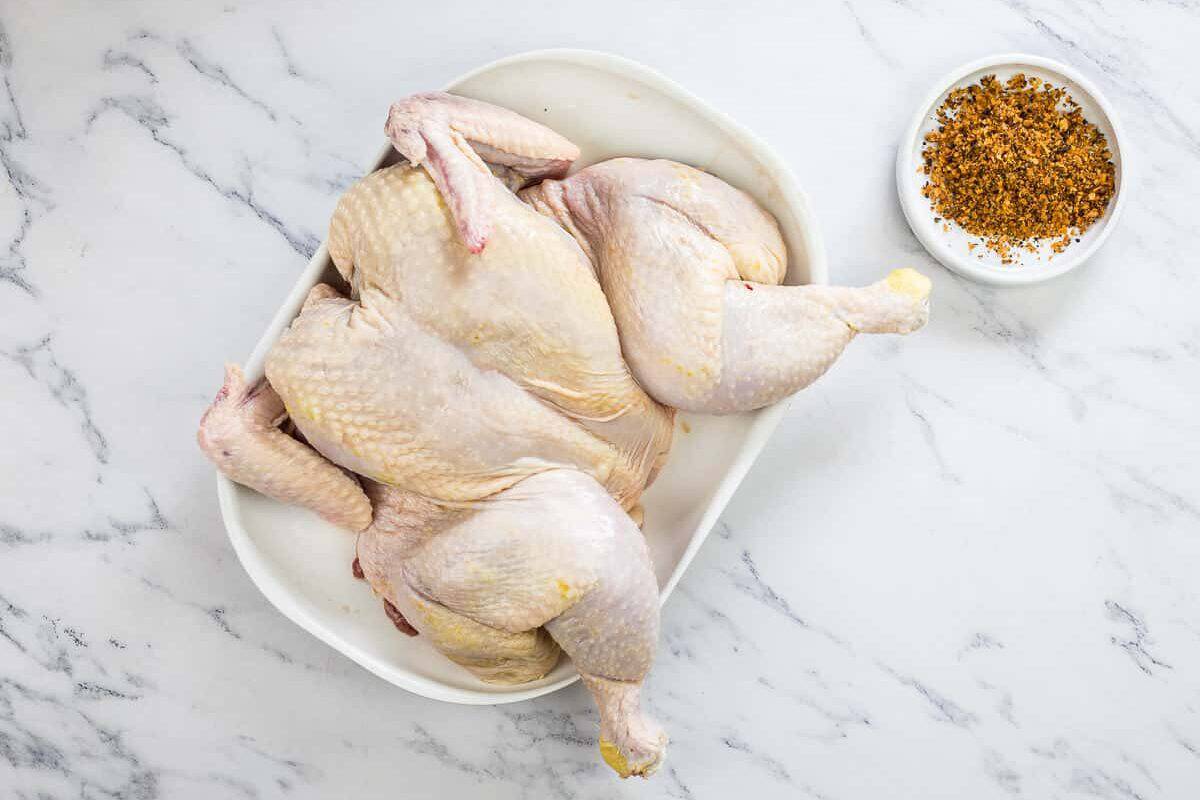
- Whole chicken – Opt for fresh, locally sourced chicken if possible. The taste is often superior to frozen varieties. Spatchcock the chicken so it cooks more evenly.
- Montreal Chicken Seasoning: This flavorful blend of spices elevates the chicken. If you can’t find it, a mix of garlic powder, onion powder, dried thyme, dried sage, and black pepper can work as a substitute.

How to Spatchcock a Chicken
Spatchcocking, or butterflying, a chicken ensures it cooks evenly on the grill. Here’s how to do it:
- Place the chicken breast side down with the tail facing towards you.
- Cut along one side of the backbone using kitchen or poultry shears, starting from the tail end.
- Repeat on the other side and remove the backbone.
- Open the chicken and press it flat. Voila! Your chicken is spatchcocked.
How to Make The Best Ninja Woodfire Grill Whole Chicken
Scroll down for the full recipe card with exact measurements and printable instructions.
Start by preheating your Ninja Woodfire outdoor grill to the Grill setting on high heat. Add pellets to the hopper and press the Woodfire button to add smoke. Set the cook time for 35 to 40 minutes so the grill is fully ready when the chicken goes on.
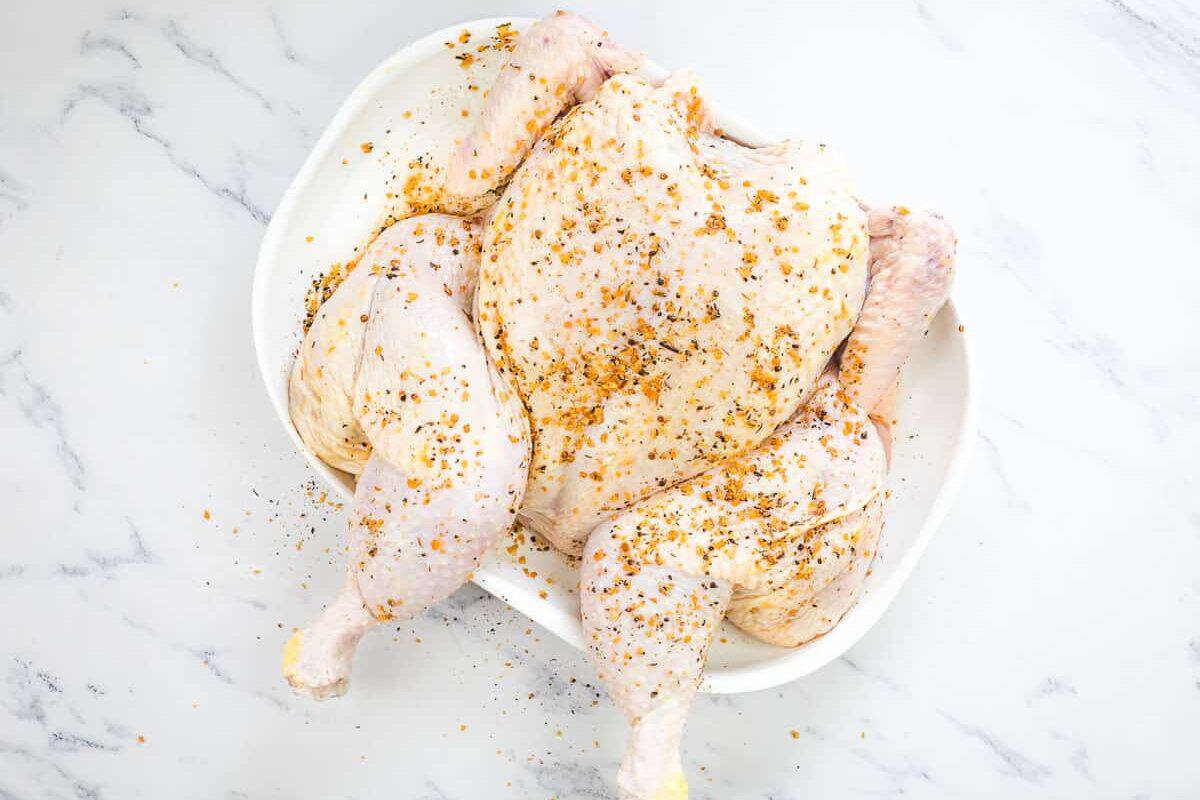
Prepare the chicken by spatchcocking it, which helps it cook more evenly and faster. Sprinkle both sides generously with Montreal chicken seasoning, making sure to cover all surfaces for the best flavor.
Place the chicken on the grill skin-side down and cook for 5 to 6 minutes to get a nice sear. This step helps render the fat and crisp up the skin.
Flip the chicken over, then reduce the heat to low. Continue cooking the chicken cut-side down for 15 to 20 minutes, allowing it to cook through gently without burning the outside.
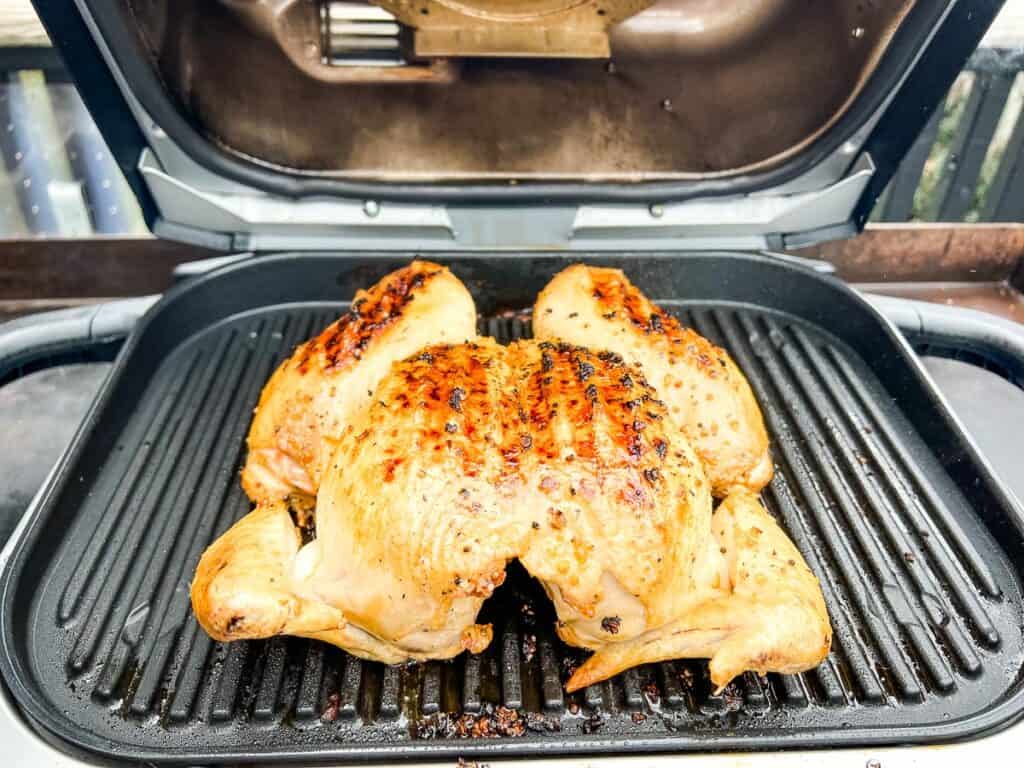
Flip the chicken back to skin-side down and continue cooking until the internal temperature reaches 160 F. Remove the chicken from the grill and let it rest for a few minutes so the juices can redistribute.
Carve and serve!

Chef Jenn’s Tips
- Pull the chicken at 155 or 160°F, not 165°F. The Ninja cooks hot and carryover cooking will take it to 165°F while it rests, which is the safe temp. Pulling at 165°F means it finishes at 170°F, and the breast goes dry every time.
- Take the chicken out of the fridge 20 to 30 minutes before it goes on the grill. A cold bird on a hot grill cooks unevenly, the outside burns before the inside is done. Tempered meat is the single biggest cheat code for grilling, and almost no home cook does it.
- Pat the skin bone dry with paper towels before seasoning. Wet skin steams instead of crisps, no matter how hot your grill is. If you have an extra hour, leave the seasoned chicken uncovered in the fridge to dry the skin even more.
- Save the backbone. After you spatchcock, throw the backbone in a freezer bag with onion peels and carrot tops. When you have two or three backbones saved up, simmer them for chicken stock that beats anything in a box.
Make It A Meal
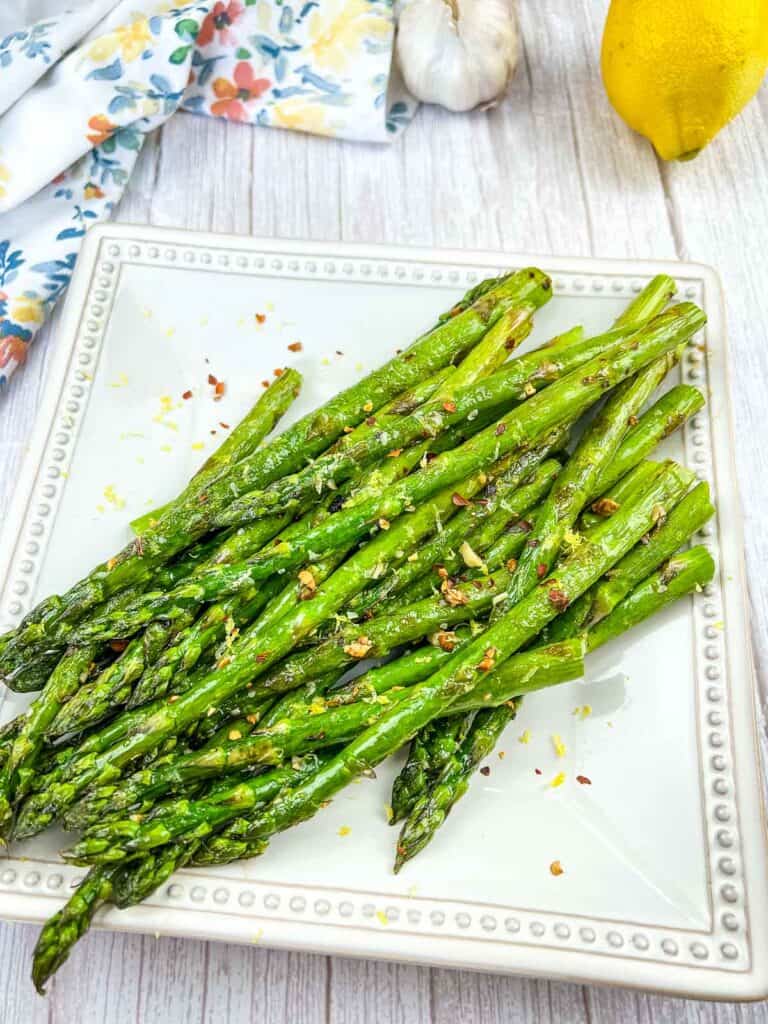
A whole chicken needs sides that can hold their own. For a cookout vibe, Grilled Elote Corn Ribs are my go-to, smoky char on smoky char and they hold up to the bigger flavors of the bird. When the chicken’s resting, I use that 15 minutes to throw smoked corn on the cob on the same grill, no extra pots, no extra cleanup. For something heartier, my Ninja Woodfire Air Fryer Smashed Potatoes come out crispy outside and creamy inside on the same machine. On a noodle night, I’ll boil pasta and toss it with this cottage cheese pasta sauce, which is high-protein, creamy, and cuts through the smoke better than any red sauce. For a lighter plate, I’ll grill asparagus with garlic alongside the chicken, the green is a fresh counterpoint and the garlic plays nice with the woodfire. And for a summer dinner party, my Grilled Peach Salad with Tomatoes and Feta brings sweet and salty that cuts through the rich bird better than anything else I make.
Storage
Store any leftover chicken in an airtight container for 3-4 days. You can use the leftover chicken in pasta salads or hot pasta dishes, or cut it up for chicken salad or add it to a wrap or sandwich. Yum!
Apple, cherry, or pecan pellets are the best match for whole chicken. They give you a clean, slightly sweet smoke that complements poultry without overpowering it. Hickory and mesquite are too aggressive for a whole bird and can leave the meat tasting bitter. Save those stronger woods for brisket and pork shoulder.
Three things get you crispy skin every time: pat the skin completely dry with paper towels before seasoning, sear the bird skin-side down at high heat for the first 5 to 6 minutes, and let the chicken rest skin-side up on a wire rack instead of a plate after it comes off the grill. Plates trap steam under the bird and soften the skin you just spent 45 minutes crisping up.
A 3 to 4 pound whole chicken is the sweet spot for the Ninja Woodfire and it’ll serve about 6 people. Anything bigger than 4.5 pounds will hang over the edges of the grill plate even spatchcocked, which means uneven cooking and longer times. If your store only carries 5+ pound birds, ask the butcher to cut it in half along the breastbone and grill the two halves side by side; same method, same timing.

Ninja Woodfire Grill Whole Smoky Chicken
Equipment
- ninja woodfire grill pellets
Ingredients
- 1 whole chicken 3-4 pounds
- 2 tablespoons Montreal Chicken Seasoning or your favorite chicken rub
Instructions
- Preheat your Ninja woodfire outdoor grill to Grill setting and high heat, add pellets to the hopper and press the woodfire button to add smoke. Set it for 35-40 minutes.
- Spatchcock the chicken, then sprinkle both sides with the Montreal chicken seasoning.
- Grill the chicken skin-side down for 5-6 minutes to sear it, then flip it over.
- Turn the heat down to low and continue to cook the chicken, cut side down, for 15-20 minutes.
- Flip the chicken so it is skin-side down and cook until it reaches 160-F then pull the chicken off to rest.
- Carve and serve!
Notes
Chef Jenn’s Tips
- Don’t have Montreal seasoning? Substitute it with your favorite poultry seasoning blend.
- Use a meat thermometer to ensure the chicken is cooked to the correct temperature. Insert the thermometer into the thickest part of the thigh, but also check the breast.
- Resting the chicken before carving allows the juices to redistribute, resulting in a juicier bird.
Nutrition
A Note on Nutritional Information
Nutritional information for this recipe is provided as a courtesy and is calculated based on available online ingredient information. It is only an approximate value. The accuracy of the nutritional information for any recipe on this site cannot be guaranteed.


So with the Ninja Woodfire Grill on the grill function on High then low you were able to fully cook this chicken in approx. 35 minutes?
Correct. It is a small, powerful compact grill that keeps the heat locked in so even whole chickens cook remarkably quickly. Of course, a huge chicken may take a bit longer. ~Jenn
What happens if the chicken is 5.5 lbs? Do we cook for a total of about 45-50 minutes instead of the 35-40? Please let me know, I’m hoping to make this tonight!!
For such a large chicken, turn the heat down a bit and cook it just until it hits 165°F in the meaty part of the thigh close to the bone. It’s hard to say how long it will take to cook. Always cook to temp not to time!
Enjoy! ~Jenn